
Tap into the beauty of spring and summer with this fresh and vibrant treat. I recommend making this pie a day in advance and refrigerating it overnight.

I have a hard time passing up the vibrant red rhubarb stalks in the market this time of year. Rhubarb is naturally flavorful, yet extremely tart. Pairing fresh rhubarb with strawberries makes an amazing old-fashioned pie.
I used my own Pastry Pie Crust recipe for this pie. You can find that recipe below.
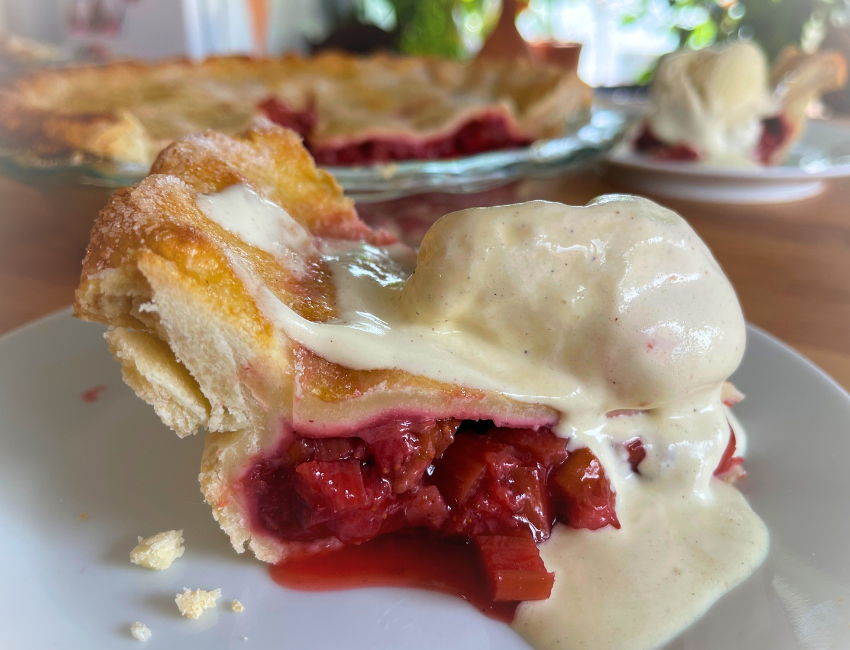
Tart and flavorful; strawberry rhubarb pie is one of my family’s absolute favorites. A cold slice of strawberry rhubarb pie topped with ice cream is just about the best dessert you can have on a hot day.
I recommend baking this pie the day before you plan on serving it and chilling it overnight.

Strawberry Rhubarb Pie
Tap into the beauty of spring and summer with this fresh and vibrant treat. I recommend making this pie a day in advance and refrigerating it overnight.
Equipment
- chef's knife
- cutting board
- deep dish pie pan
- strainer
- 2 arge mixing bowls
- Rolling Pin
- pastry scraper
- utility spoon
- wooden spoon
- fine mesh grater
- aluminum foil
- pastry brush for egg wash
- small bowl for egg wash
- a fork or a small whisk for beating egg for egg wash
Ingredients
- 4 cups rhubarb cubed, about 6 stalks
- 5 cups strawberries cubed
- 1 ½ cup sugar
- 1 – 2 tbsp lime zest zest of one – two limes
- 1/4 cup corn starch
- 1/2 tsp cinnamon
- 1/8 tsp salt one pinch salt
- 2 tbsp sugar for topping
- 1 unit egg, beaten egg wash for top of pie
Instructions
- Preheat your oven to 375 degrees, F. Slice each rhubarb stalk lengthwise at least once – more for very wide stalks.

- Chop each slice so you have a nice bunch of uniformly cubed rhubarb pieces.

- Slice each strawberry into fourths, lengthwise, then dice those pieces. See video.

- Mix the five cups of strawberries and four cups of rhubarb in a large mixing bowl. Add 1 1/2 cups sugar and stir.

- Zest one lime taking care to zest just the green part of the peel and not the white pith. Mix the lime zest gently into the fruit and sugar mixture. Set aside for about 20 minutes so the fruit will rest and release liquid and your pie won't end up soggy. See video.

- While your fruit is resting, roll out your pastry. I recommend my recipe, "Shannon's Pastry Pie Crust" found on this site and on my youtube channel.

- Form the pastry into deep dish pie pan.

- By now your fruit should be ready to separate from the liquid. Using a sieve or a spider/skimming spoon, move the fruit into a second large mixing bowl. Leave the liquid behind.

- After the first draining, add the 1/4 cup corn starch, 1 pinch of salt and 1/2 teaspoon cinnamon. Mix and set aside to release more liquid.

- This is the last time you will need to separate the fruit from the liquid before you bake your pie. Again, use a fine sieve or a spider/skimmer spoon and lift the fruit out of the liquid. See video.

- Gently spoon your pie filling into the pie.

- Top with pie crust. For lattice instruction, see video.

- For the first part of baking, gently cover the pie with a sheet of aluminum foil. Bake at 375 degrees for 40 minutes, or until you can see that the rhubarb is cooked through. See below.

- Try and see if you can poke a piece of rhubarb through the lattice. If you can easily pierce it with the tine of a fork, you know it's done.

- Now is when you use a pastry brush to brush on the egg wash, and dust the top of the pie with granulated sugar. Turn the oven up to 400 degrees and bake for another 10-15 minutes.

- If you find that the outer rim of your pie is browning faster than the inner circle of your pie, make a "pie collar" out of a long piece of aluminum foil, cut lenghwise, then folded over on itself, and connected by folding the ends so it's one very long piece that can wrap around the pie. See video.

- Keep an eye on it and bake it until it's evenly done and beautiful. Let it cool to room temperature and put in the fridge overnight. Of course, you can serve right away if you want (who can resist?), but the insides may be runny. It will still taste amazing, though. It's really good served with vanilla ice cream.

Tried this recipe?Let us know how it was!

Shannon’s Pastry Pie Crust in 2 Ways
The best pie crust. This recipe makes enough for the bottom and top of a deep dish pie. I do recommend making more than you think you'll need, however. It will put your mind at ease knowing that if you make a mistake rolling out your pie dough, you have a backup batch. Freezes excellently for up to eight weeks. Will keep in the fridge for one week. PLEASE DO REMEMBER to let it warm to room temperature before you roll it out.
Equipment
- food processor
- ramekin
- pastry scraper
- measuring cups
- measuring spoons
- plastic wrap
- utility knife
- cutting board
Ingredients
- 1/2 cup lard cubed and frozen
- 1/2 cup unsalted butter cubed and frozen
- 3 cups all-purpose flour
- 2 tbsp sugar
- 1 tsp salt
- 6 tbsp ice cold water
Instructions
- At least an hour in advance, cube the 1/2 cup unsalted butter and 1/2 cup lard, and freeze it together in a ramekin or small bowl.

- Sometimes I do this step in bulk if I know a big pie event (like Thanksgiving) is coming up. I freeze each batch in a separate ramekin so I can just grab a batch and go. Batches of lard and butter cubes can be kept in the freezer for a week uncovered. If you plan to freeze them for longer, cover with plastic wrap.

- In the bowl of your food processor, combine 3 cups flour, 2 tablespoons sugar and 1 teaspoon salt. Whir to mix.

- Add the ice cold butter and lard in batches, whirring between each addition. You will know it's time to move to the next step when the mixture clumps together in your hand like wet sand. See video for more instructions.

- Add the ice cold water one tablespoon at a time while the food processor is whirring. You will know it's time to turn your mixture on to your work surface when it clumps together in your hand like clay. See video for more instructions.

- Your mixture will look like a mess, but please don't be scared and for heaven's sake don't add more water or anything. Start to work to push the pastry crumbs together.

- This is when you trust the process and keep moving and squeezing the mixture together. See video for more instruction.

- When the mixture has formed into a lump, do your best to form it into an oblong log shape.

- Slice it in half with your pastry scraper.

- Working each section in a circular motion, form into discs. See video.

- Wrap each disc in plastic wrap. You can simply set on the counter for a couple hours before rolling it out for pies, but I recommend putting it in the fridge overnight, then bringing it to room temperature (4-5 hours) before you roll it out. You can keep it in the freezer for up to 8 weeks. Again, let it come to room temperature before you begin to work with it.

Mixing By Hand
- To make pie crust by hand, use 1/2 of this recipe at a time, as you will need a smaller quantity of ingredients to mix by hand properly.
- Measure out 1 1/2 cups flour, 1/2 teaspoon salt and 1 tablespoon sugar on your work surface.
- Create a little well in the center of the dry ingredients and add 1/4 cup butter (cubed and frozen) and 1/4 cup lard (cubed and frozen).
- Using your thumb and forefinger on each hand, press and shift the chunks of lard and butter so sheets of butter and lard are formed.

- If you are having trouble working with your cubes, take two cutlery knives and holding one in each hand and crossing them like an "x", slice them each away from each other. See video. Or you can use a pastry cutter.

- Once your chunks of fat are smaller, continue to work with your hands until your fat chunks are flat and about pea-sized
- Gather the flour/fat mixture into another mound and form a well in the mound.
- Gently add 3 Tablespoons of ice cold water right into the middle of the well, making sure to keep the moisture in the well of the flour and fat. Pinch the water into the flour with your thumb and forefinger and soon you will have a thick paste. At this point, you will be safe to start working the pastry with your whole hand and not worry that you will lose moisture to your work surface. See the video for more instruction.
- Gently and patiently work the pastry with your hands, pressing it together and turning it as you go. See video.
- Form into a "hockey puck" shape and wrap with plastic wrap. The handmade pastry will not be as good for sculpting and decorative flourishes, but it will be superior to the food processor pastry in flakiness and bubbly texture.
Rolling out the Pastry
- When rolling out a pie pastry, it's important to lightly dust your surface with flour, and to roll the pastry out gently; avoiding any divots. Meaning, keep the pastry the same thickness as you roll it out.

- Your goal here is to form a circular shape and to keep a circular shape throughout this whole process.
- Periodically, inspect the edges of your circle and push any fissures or cracks together.

Putting the Pastry in the Pie Pan
- To transfer the pastry from the work surface either fold the pastry into fourths, pick up the fold pastry and unfold in the pan, or roll up the pastry around the rolling pin, place the rolling pin on the pie pan and unroll on the pan. Settle the pastry and pinch the edges decoratively. See video.

Blind Baking the Pie Shell
- Blind baking is essential if you are going to fill your pie shell with a stovetop cooked custard like chocolate custard – and you don't intend to cook the filling and the crust at the same time.
- After your pie pastry is settled in the pan and you've done some decorative pinching around the sizes, nestle some parchment paper in the pie, making sure the parchment paper hangs over the edges of the pie (to protect the rim from over baking).
- Pour ceramic pie weights into the pie shell, over the parchment paper. You can use dry, raw, uncooked beans in the place of ceramic pie weights if you wish.
- Bake at 350°F for 15-20 minutes.
Tried this recipe?Let us know how it was!