


The best, most decadent, lush and unforgettable pie. My chocolate cream pie recipe uses ten egg yolks and three cups of semi-sweet chocolate chips to make a delicious custard on the stove top.

The custard is then poured into a pre-baked pie shell. For my recipe and a complete lesson on how to make this pastry and how to “blind bake” it, go to the post HERE.

Separating egg yolks from egg whites is the first step in making this pie. If you’ve never separated egg yolks and whites before, watch the video I have attached. Actually, making this pie is a great way to practice. You don’t need to worry about keeping the egg whites pure of bits of yolk – so mistakes can be made. You won’t be using the whites at all – just the yolks.

If you don’t feel great about throwing out all these whites, you can make a big egg white omelette or freeze the egg in a freezer safe container. Egg whites will keep in the freezer for up to a year.
To get started mixing the custard, mix the sugar, cornstarch and salt in a 3 quart saucepan without turning the heat on the burner. Add the ten egg yolks and stir with a spatula until you get a smooth, yellow mixture.
Add a cup of the milk and whisk. THEN turn the heat on the burner. Medium heat. You will not go over medium heat at all in the process of making this custard.
Stir continuously over medium heat and add the milk one cup at a time. When the milk has all been incorporated into the custard, keep stirring until the mixture is thick enough to start forming lines from the imprint of the whisk and as “lava bursts” start to form. Be very careful, and really give it all you’ve got (stirring) until the lines are deep, and you cannot stand it anymore. Turn the heat off and continue to stir until no more “lava” bursts form.
This whole custard process will take about ten minutes.
Pour in the three cups of semi-sweet chocolate chips and gently fold in with a spatula.
The mixture will be smooth and it will smell amazing.
Add 2 teaspoons vanilla extract and 2 Tablespoons of butter. Stir to combine and melt the butter.
Pour the custard into the pre-baked pie shell. Chill pie for at least 8 hours – or up to 1 week in the fridge.
To make whipped cream, whip 1 cup of heavy whipping cream with 1/2 cup of sugar. More instructions on the printable recipe below.

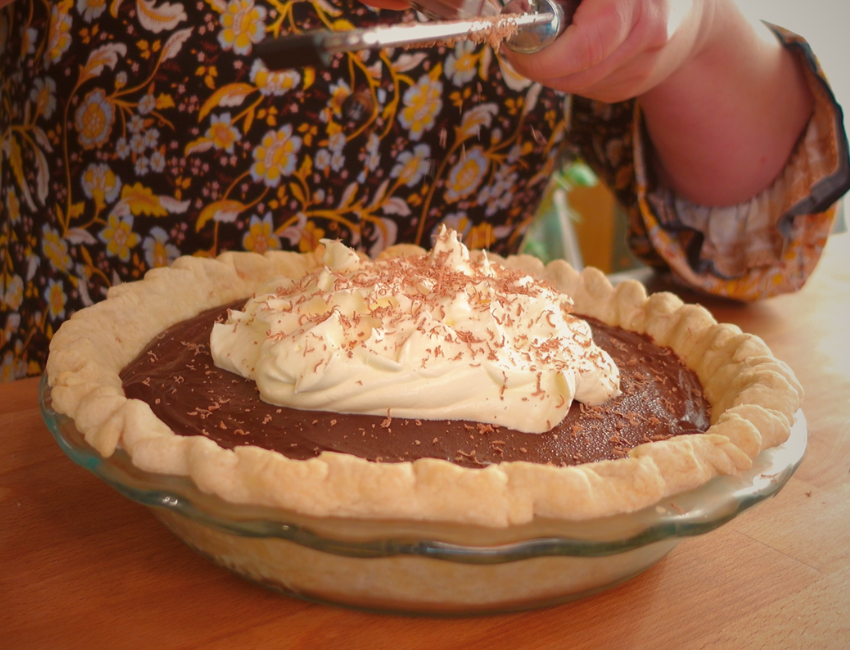
Immediately before serving, dollop with pie with whipped cream.

Garnish with fresh chocolate shavings.

Enjoy!

Deep Dish Chocolate Cream Pie
Ingredients
- 1 batch of my pastry pie crust, "blind baked" You can find both the recipe and procedure on this website.
For the Chocolate Custard
- 10 egg yolks
- 1/2 cup sugar
- 1/4 cup corn starch
- 1/4 teaspoon salt
- 4 cups whole milk room temperature is preferable
- 3 cups semi-sweet chocolate chips
- 2 teaspoons vanilla extract
- 2 Tablespoons butter unsalted or salted – either will work
For the Whipped Cream
- 1 cup heavy whipping cream
- 1/4 cup granulated sugar
For the Garnish
- a chocolate bar or some chocolate chips milk or dark chocolate – either is fine
Instructions
Making the Custard
- In a 3 quart saucepan off heat, combine the sugar, cornstarch and salt. Stir with a whisk to combine.
- Still off heat – Add the ten egg yolks and combine with the dry ingredients. Stir with a whisk until you have a smooth, yellow mixture.
- Still off heat – add 1 cup of the milk and whisk until your mixture is light and smooth.
- Now turn on the heat and put your pan on the burner. Medium heat, and stir with a whisk continuously.
- Prepare yourself for about ten minutes of constant stirring. As soon as your mixture thickens a little, add more milk, one cup at a time.
- Keep whisking continuously. You can see my method on the attached video. In short, try and move your whisk over every bit of the saucepan bottom. I use a zipper motion. You want your whisk to scrape the bottom of the pan continuously.
- When all your milk has been poured into and thickened into the custard, keep stirring until your custard is starting to form "lines" from the whisk. As soon as lines start to form and "lava" burst start to surface, turn the heat to low and keep stirring.
- When you are confident that: A) You cannot go on one more minute, or B) That your mixture is thick enough to deep, distinguishable lines on the surface,turn the heat off and add the chocolate chips.
- Fold the chocolate chips in with a spatula until your custard is smooth.
- Pour the chocolate custard into your prepared "blind baked" pie shell.
- Chill the pie the fridge for (at least) 8 hours, or up to a week.
Making the Whipped Cream (make just before serving the pie)
- Pour 1 cup heavy whipping cream into the bowl of your heavy duty stand mixer, or into a large bowl if you are using a hand mixer.
- Whip on high for about one minute – as soon as the cream is slightly stiff add the sugar.
- Whip until you get a cream stiff enough to form "soft peaks".
Finishing the Pie
- Immediately before serving, dollop whipped cream into the center of the pie.
- Using a plane grater, grate shavings of a chocolate bar over the pie. Or sprinkle the the pie with chocolate chips.

Shannon’s Pastry Pie Crust in 2 Ways
Equipment
- food processor
- ramekin
- pastry scraper
- measuring cups
- measuring spoons
- plastic wrap
- utility knife
- cutting board
Ingredients
- 1/2 cup lard cubed and frozen
- 1/2 cup unsalted butter cubed and frozen
- 3 cups all-purpose flour
- 2 tbsp sugar
- 1 tsp salt
- 6 tbsp ice cold water
Instructions
- At least an hour in advance, cube the 1/2 cup unsalted butter and 1/2 cup lard, and freeze it together in a ramekin or small bowl.

- Sometimes I do this step in bulk if I know a big pie event (like Thanksgiving) is coming up. I freeze each batch in a separate ramekin so I can just grab a batch and go. Batches of lard and butter cubes can be kept in the freezer for a week uncovered. If you plan to freeze them for longer, cover with plastic wrap.

- In the bowl of your food processor, combine 3 cups flour, 2 tablespoons sugar and 1 teaspoon salt. Whir to mix.

- Add the ice cold butter and lard in batches, whirring between each addition. You will know it's time to move to the next step when the mixture clumps together in your hand like wet sand. See video for more instructions.

- Add the ice cold water one tablespoon at a time while the food processor is whirring. You will know it's time to turn your mixture on to your work surface when it clumps together in your hand like clay. See video for more instructions.

- Your mixture will look like a mess, but please don't be scared and for heaven's sake don't add more water or anything. Start to work to push the pastry crumbs together.

- This is when you trust the process and keep moving and squeezing the mixture together. See video for more instruction.

- When the mixture has formed into a lump, do your best to form it into an oblong log shape.

- Slice it in half with your pastry scraper.

- Working each section in a circular motion, form into discs. See video.

- Wrap each disc in plastic wrap. You can simply set on the counter for a couple hours before rolling it out for pies, but I recommend putting it in the fridge overnight, then bringing it to room temperature (4-5 hours) before you roll it out. You can keep it in the freezer for up to 8 weeks. Again, let it come to room temperature before you begin to work with it.

Mixing By Hand
- To make pie crust by hand, use 1/2 of this recipe at a time, as you will need a smaller quantity of ingredients to mix by hand properly.
- Measure out 1 1/2 cups flour, 1/2 teaspoon salt and 1 tablespoon sugar on your work surface.
- Create a little well in the center of the dry ingredients and add 1/4 cup butter (cubed and frozen) and 1/4 cup lard (cubed and frozen).
- Using your thumb and forefinger on each hand, press and shift the chunks of lard and butter so sheets of butter and lard are formed.

- If you are having trouble working with your cubes, take two cutlery knives and holding one in each hand and crossing them like an "x", slice them each away from each other. See video. Or you can use a pastry cutter.

- Once your chunks of fat are smaller, continue to work with your hands until your fat chunks are flat and about pea-sized
- Gather the flour/fat mixture into another mound and form a well in the mound.
- Gently add 3 Tablespoons of ice cold water right into the middle of the well, making sure to keep the moisture in the well of the flour and fat. Pinch the water into the flour with your thumb and forefinger and soon you will have a thick paste. At this point, you will be safe to start working the pastry with your whole hand and not worry that you will lose moisture to your work surface. See the video for more instruction.
- Gently and patiently work the pastry with your hands, pressing it together and turning it as you go. See video.
- Form into a "hockey puck" shape and wrap with plastic wrap. The handmade pastry will not be as good for sculpting and decorative flourishes, but it will be superior to the food processor pastry in flakiness and bubbly texture.
Rolling out the Pastry
- When rolling out a pie pastry, it's important to lightly dust your surface with flour, and to roll the pastry out gently; avoiding any divots. Meaning, keep the pastry the same thickness as you roll it out.

- Your goal here is to form a circular shape and to keep a circular shape throughout this whole process.
- Periodically, inspect the edges of your circle and push any fissures or cracks together.

Putting the Pastry in the Pie Pan
- To transfer the pastry from the work surface either fold the pastry into fourths, pick up the fold pastry and unfold in the pan, or roll up the pastry around the rolling pin, place the rolling pin on the pie pan and unroll on the pan. Settle the pastry and pinch the edges decoratively. See video.

Blind Baking the Pie Shell
- Blind baking is essential if you are going to fill your pie shell with a stovetop cooked custard like chocolate custard – and you don't intend to cook the filling and the crust at the same time.
- After your pie pastry is settled in the pan and you've done some decorative pinching around the sizes, nestle some parchment paper in the pie, making sure the parchment paper hangs over the edges of the pie (to protect the rim from over baking).
- Pour ceramic pie weights into the pie shell, over the parchment paper. You can use dry, raw, uncooked beans in the place of ceramic pie weights if you wish.
- Bake at 350°F for 15-20 minutes.